I saw a stocking like these on Pinterest and I just HAD to make them! They are so cute and I thought I could make a personalized one for each member of my family. My husband, Eric's is the blue BYU one. Mine is the one with purple flowers. And my son, Hunter's is the one with the hunting theme! :)

FYI: I am not a professional at sewing, measuring, cutting, tracing, or drawing. I only took a sewing class like forever ago in junior high, so I usually make things up as I go. I don't use patterns or have any fancy stuff, like an iron or tracing markers, etc. I will try my best to explain each step. If you have any questions, feel free to ask!
First, pick your theme! I'm going to demonstrate with the hunting themed stocking.
You will need:
- a regular stocking. I use this stocking for the white fluff on top. I also use the red socks to trace the fabric.
- "front" fabric. fabric for the front. These can be different patterns, textures, colors, and even fabric, like silk, cotton, or felt. I used five different fabrics on this stocking. I used 6 on mine and 5 on Eric's. (I personally think 5 is the magic number.) I used twelve strips total. They were each about 4-6 inches thick and 11-12 inches long, to be safe.
- "back" fabric. fabric for the back. This is just one piece of fabric. I used brown for Hunter's stocking and it was about 20 inches by 13 inches.
- "inside" fabric. You won't see this fabric so it can be from scrap fabric, like an old sheet, pillow case, or t-shirt. I used a pillow case with mine and Eric's, and a t-shirt with Hunter's. Make sure the fabric isn't stretchy though.
- a sewing machine
- sewing pins
- thread picker
- scissors
- a marker
- a piece of chalk
- a pencil
- ruler
- 2 pieces of paper (to make a plan with)
- tape
Directions:
Carefully unpick the stocking with the thread picker.
Set the white fluffy part to the side for now. You won't need it until the very end. Take one of the red pieces and trace it onto the "inside" fabric. I traced onto an old t-shirt with a marker. You can throw the red pieces away unless you plan on using them for something else. Trace the one "inside" onto another "inside." You want two. Cut them out.
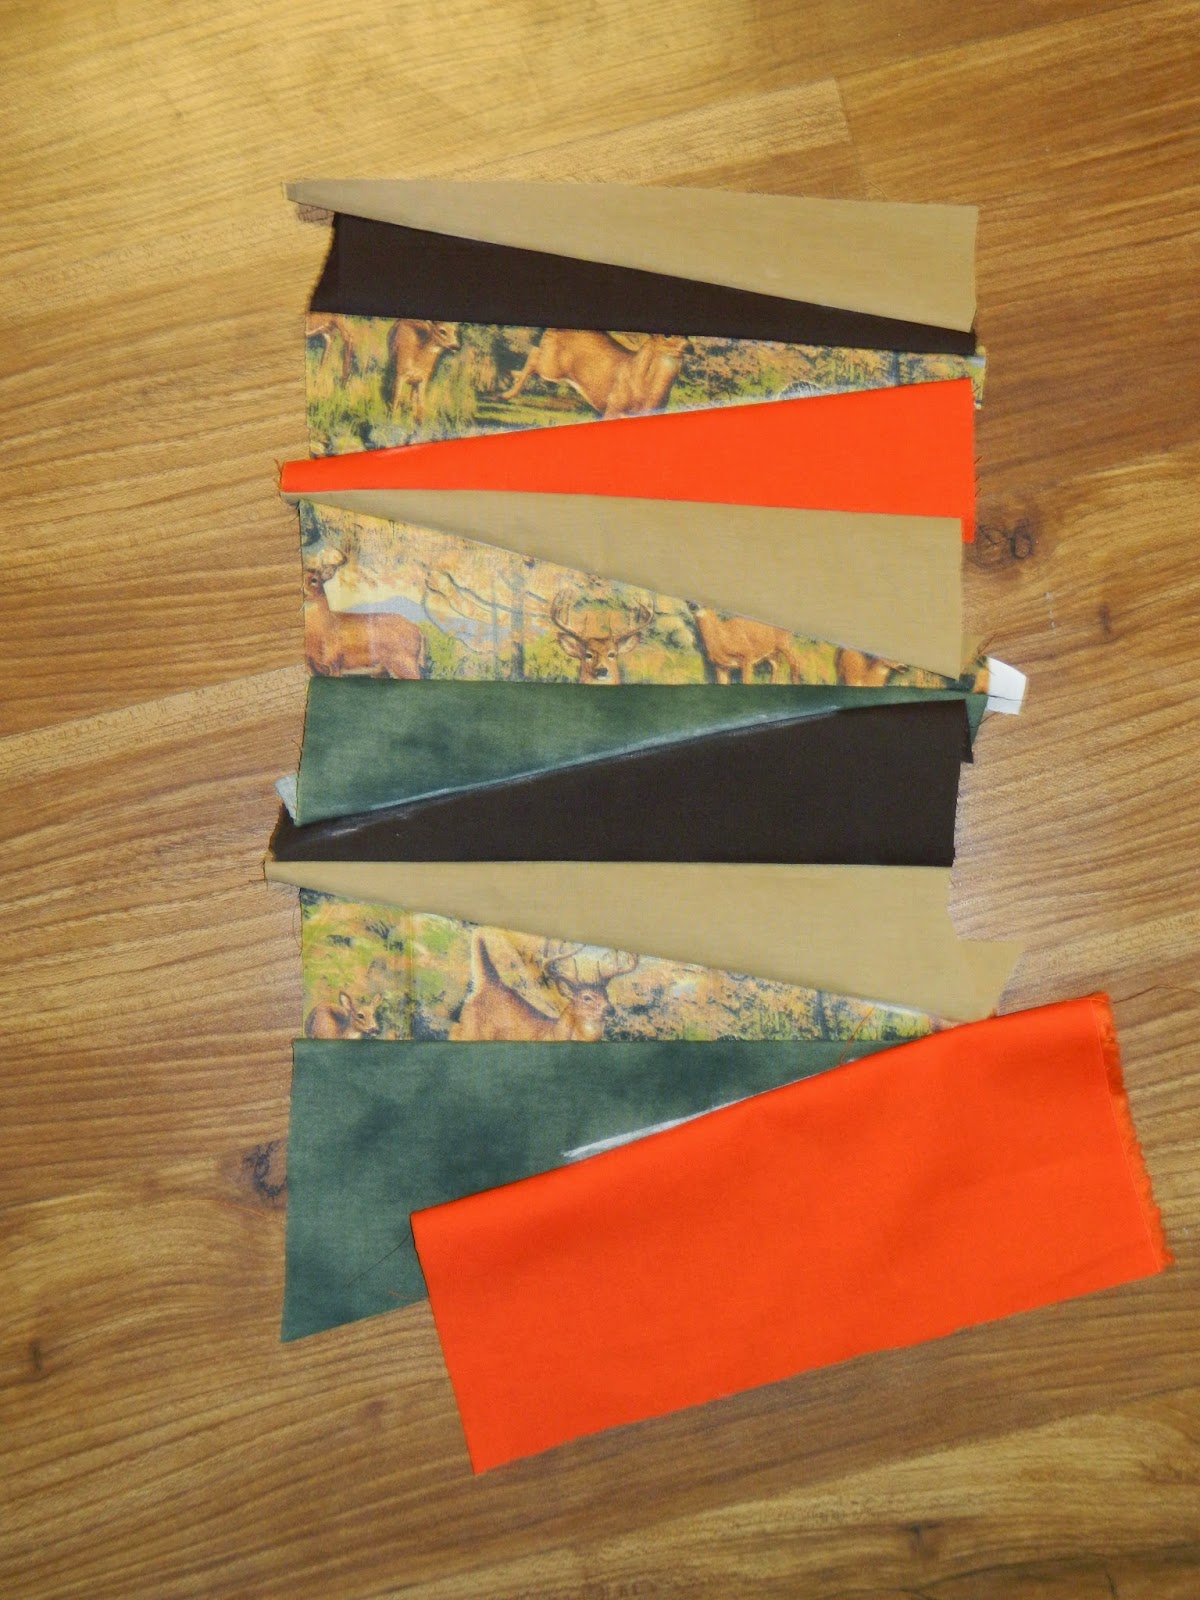
Take the "front" fabric and put them in the order that you want. I decided on this order.
Now its going to get tricky. Tape the two pieces of paper together and then trace the "inside" stocking onto it. I divided it into six even rows and then drew my diagonals in each row. You can use the ruler, but you basically want it to look something like this.. Cut the stocking out and then in each triangle, write the number and fabric description so you can easily find which piece of fabric goes where. So for example, my top piece is tan so I wrote "1. TAN" in the first triangle, then "2. BROWN" in the second, "3. DEER" in the third, "4. ORANGE" next and so forth.
If you can't read my handwriting, the order of my fabrics is:
1. TAN, 2. BROWN. 3. DEER. 4. ORANGE. 5. TAN. 6. DEER. 7. GREEN. 8. BROWN.
9. TAN. 10. DEER. 11. GREEN. 12. ORANGE
Okay, now its going to get a little confusing, but trust me. So each of the twelve strips now has a number. Set aside strip #1 and #12. Now pin #2 and #3 together. #4 and #5 together. #6 and #7 together. #8 and #9 together. #10 and #11 together. It should look like this.
TWO IMPORTANT TIPS:
1. When you pin your fabrics together, make sure that the fabrics are facing each other. You don't want to have to unpick and resew. Trust me, I've fallen victim to this many times!
2. When you pin, make sure the fabrics are in the right order. So yes, I need to sew the DEER fabric and the GREEN fabric together. But I needed to make sure that I pinned it so that the DEER fabric was above the GREEN fabric. I hope this makes sense!
Open up all pieces after you have pinned them. These are all the pieces I pinned, not sewn yet. I like to double check to see if I've made a mistake somewhere. Like I've said, I don't want to sew, then unpick, then resew. I get frustrated way too easily! Haha!
Time to get sewing!
I don't know the measurements or anything. Sew as close to the edge as possible..
Lay out each piece. Keep them in order! You don't want them to get out of order and have to redo everything!
Grab fabric #1 and #2/#3 (#2 and #3 are sewn together).. Cut the first two triangle-shapes out of the paper stocking. Pin them to the fabric, like the picture below, with the name of the paper on the correct piece of fabric (tan on tan, brown on brown).
Now take a piece of chalk and trace the outline of the triangle onto the fabric, like below. Trim the fabric so it will be easier to sew.
Now line up the two chalk lines together. Fold so there is a line. (This is where an iron would've been useful!) Pin along the line.
Make sure you double check often to see if you are doing it right. (This is before it was sewn.)
This is after it was sewn.
Repeat with the other pieces. Cut the triangle from the paper stocking. Pin it to its corresponding fabric. Chalk it up. Trim. Align the two pieces of fabric along the chalk line. Fold (and iron). Pin the two pieces together. Sew.
This is what you will get when you are done.
Front and Back. (Trim the back a little so its not so long..)
Flip the front side over and align one of the "inside" stocking with it. Pin it and sew it as close to the edge as you can get. Trim the outline of the stocking a little bit.

Do the same thing with the back and the other "inside" stocking.
Pin, sew, and trim.
Final pieces of the front and the back.
Now align the lines of the stockings, like below.
(I ran out of purple, so I used orange thread. The color does not matter.)
Remember to sew the right side to the other right side! So you can see the the "inside" fabric as you sew. You want the stocking to be inside out at this point.
Pin the two pieces together.
Sew on the left side of the first line without crossing it.
Remember: don't pin or sew the top part!
Once you're done sewing it, trim some of the stocking.
Don't cut the piece of thread that's holding your stocking together!
Flip it inside out and there you go! A stocking!
Grab that fluffy part that you set aside from earlier. Flip both the stocking and the fluffy part inside out. Align the fluffy part to the top of the stocking. Pin it and then sew it. Make sure the seam of the fluffy part is aligned with the seam of the stocking on one side.
Tada! You have a stocking!
Be sure to show it off to Santa this year!
 |
| Hunter's is the third stocking I did. It's the best! |
 |
| Eric's is the second one I did. |
 |
Mine was the first one I did.
It did not turn out as great! |
Update: I added hooks onto each of the stockings. I cut a piece of felt about 1/2 an inch thick and three to four inches long (depending on how low you want your stocking to hang)..
Then I turned it inside out and then sew it. I forgot to get more pictures before I put them away though. :\
If you have any questions, concerns, or comments, please let me know!
My email is melrhodes92@gmail.com